Jonathan,
Since these emails are from an automated source, I like to start by creating a unique hosted email address for the messages rather than using a shared address. The advantage is that you then know that all emails sent to in this box are for the user creation process.
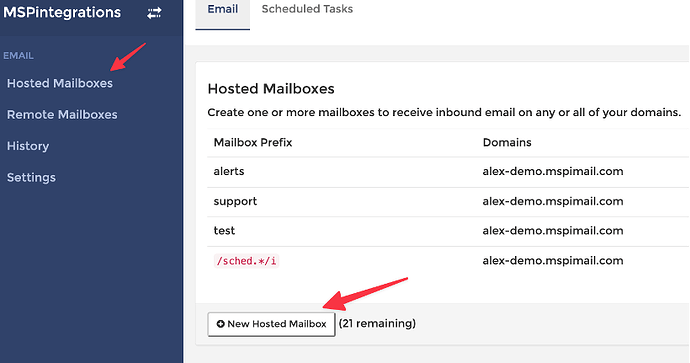
In the MSPI Console use the Hosted Mailboxes tab to create the mailbox:
Complete the fields shown below and save to create a new hosted mailbox:
Complete the fields shown below and save to create a new hosted mailbox:
Use the Edit button to open the new mailbox and create your rule inside the mailbox.
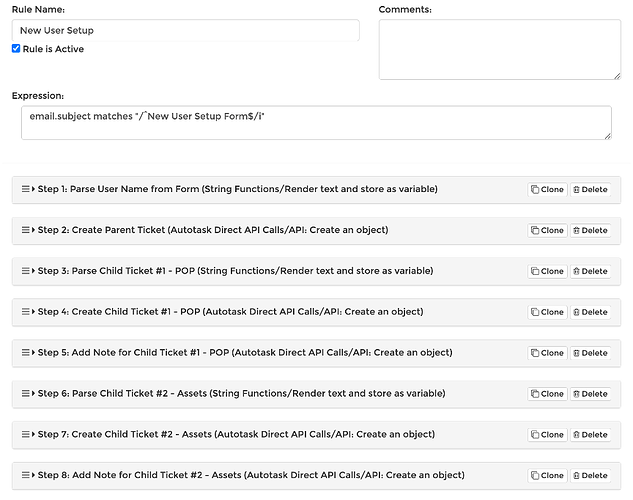
Here is the outline of the ticket creation and linking process.
- Form is received as email and triggers process if subject line matches
- Parse and save UserName for use in creating ticket names
- Create Parent Ticket with description set to the contents of the form
- Create Child Ticket #1
a. Parse ticket #1 details from email body
b. Create ticket using parsed info as description and include Parent Ticket number in description. (This will be treated as a link by Autotask)
c. Add note to the Parent Ticket with Child Ticket #1’s Title and Ticket Number
- Create Child Ticket #2
a. Parse ticket #2 detail from email body
b. Create ticket with parsed info as description and include Parent Ticket number in description. (This will be treated as a link by Autotask)
c. Add note to the Parent Ticket with Child Ticket #2’s Title and Ticket Number
… Repeat process for an many Child Tickets as needed
Here it is as a rule:
Here are details on each of the script steps. Note these are intended to show you concepts for how to approach doing what you want to do and they are not likely to be the exact the steps needed.
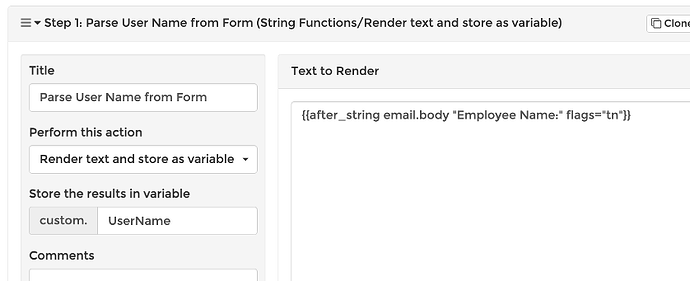
This step uses the after_string helper to parse the user name from the email body and store it in the variable custom.UserName. The “t” flag trips off leading and trailing spaces and the “n” flag stops grabbing text at the end of the current line.
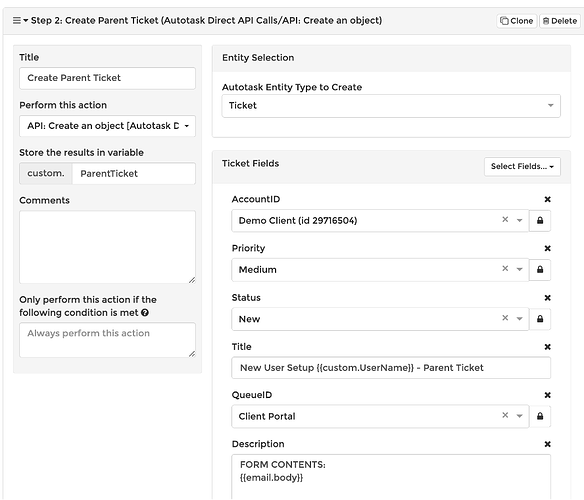
Next. we create the parent ticket with the minimum fields needed. You can of course add and set any ticket field. We use the saved UserName as part of the ticket Title. The entire form is added to the ticket description. The new Parent Ticket is stored in the object variable custom.ParentTicket so we can use the ticket number later.
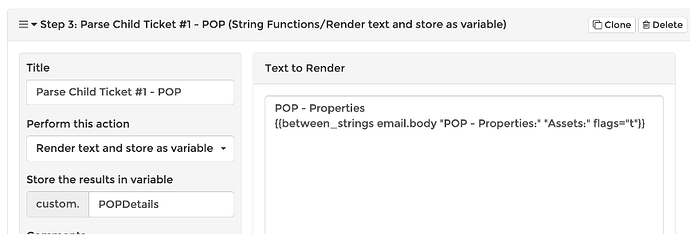
Now, we parse the form details for the first Child Ticket. Here I am calling it the POP Ticket. We use the between_strings helper. You will have to be careful to select a starting and ending string that will not change from one form to the next. The results are stored in custom.POPDetails.
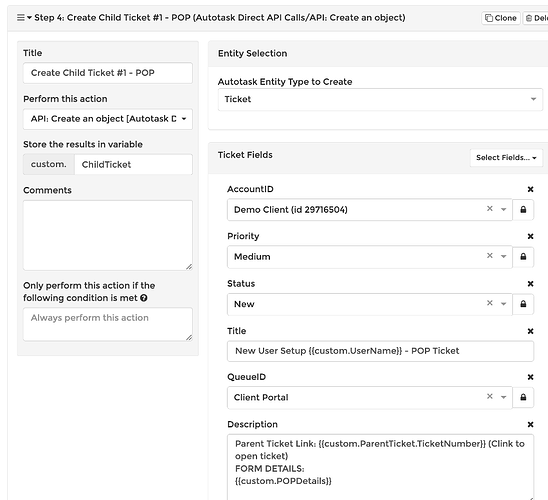
We create the first Child Ticket and save it in the object named custom.ChildTicket. The title includes the UserName and the name we have given the ticket. The description include the Parent Ticket number and Autotask will automatically make this into a link to that ticket. It also includes the POPDetails we saved earlier.
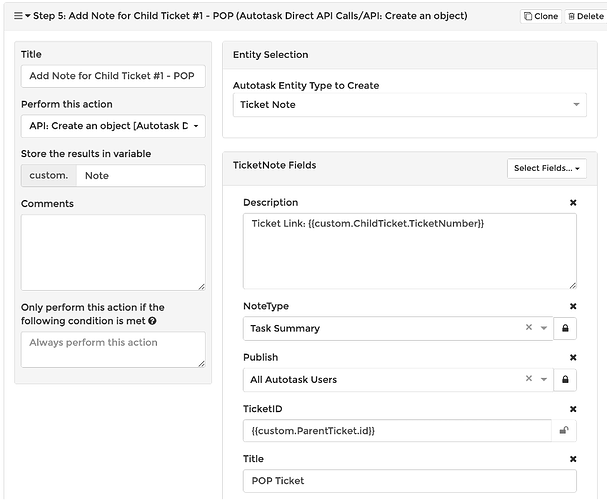
Finally, we add a note to the Parent Ticket to link it to the Child Ticket we just created. The note description includes the Child Ticket number and that will become a link.
These steps can be repeated as needed to create each child ticket and link it to the parent.
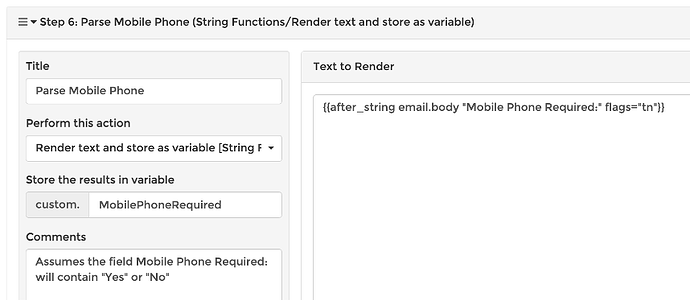
For tickets that are conditional you will want to parse the condition from the form and use it to skip steps if they are not needed. The example below assumes there is a field in the form named “Mobile Phone Required:” and that is will always be “Yes” or “No”.
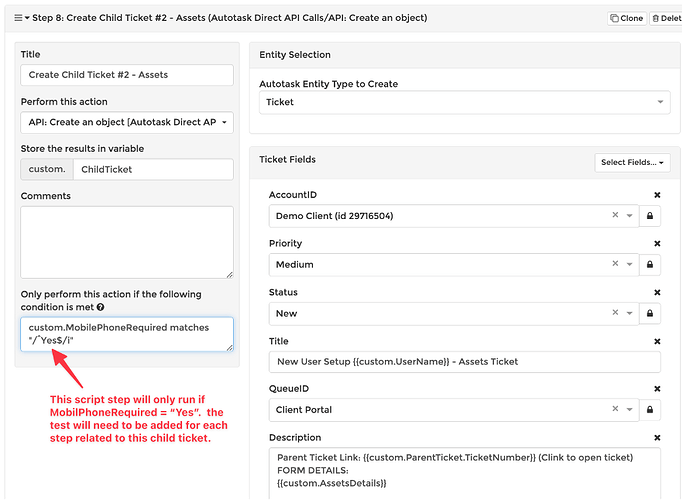
Once we have the answer stored in the variable custom.MobilePhoneRequired we can use it to run or skip script steps as shown here.
I know this is quite a bit of info. I hope it helps you get started on your rule.
